Saturday 31 October 2015

"A"ffection and "P"rayer

The next two monogram in the quilled typography series is completed with the letters "A" and "P".
This time, a simpler Adine Kirnberg calligraphic font is used for the text. Beehive pattern for filling and distressing ink is used to create the colorful background with a contrasting effect.

Here comes "A" with affection and "P" with prayers.


The Outline

Side View


The Outline
Thank you, friends, for reading and liking my posts and motivating further :)

Tuesday 27 October 2015

A set of round gift boxes

Again it is time for some 3D quilling.

Here comes a set of three round shape boxes in white, yellow and black color themes. The bases are created on embossed papers, cut in round shape. However, it can be also done without that base and fully with 3D tight coils by quilling.


These can be used as small gift boxes with some light weight gifts inside or some nice quotations inside as gift tags.

Saturday 17 October 2015

Love and Joy

Typography is my most favorite in quilling. Be it a single letter or word(s), I have created 25 projects so far in typography related to gifts and customized orders for sale.

With a limited set of paper strips in hand, my plan is to create a series of 6 quilled monograms in Royale Initialen calligraphic font on 6/8 inches softly textured cardstocks.

The festive season has commenced. I wish this season brings us a lot of joy and smile and keep us bonded with love with our near and dear ones. This is a homecoming season as well, however, this year I am really going to miss my home and especially the festival of "Durgapuja".

Here's presenting the first two letters of this series. "L" for Love and "J" for Joy.


The snapshots and close views are also provided in the pictures below. The Royal Initialen fonts are available in www.dafont.com and can be downloaded and installed to use them further in your projects.

The font printed on a plain paper

The impression is taken on the cardstock


The font printed on plain paper


Please visit my page "Lights and Papers" in Facebook for more pictures.

The Wings of Freedom

"Birds have wings, Souls have dreams"....Anonymous

With that, I will like to present my next picture quilling project which I named as "The Wings of Freedom", the freedom of soul, the freedom to fulfill our dream in our own way.

The steps are as follows:

1) The background is created on a 6/8 inches softly textured card stock paper using umber black acrylic paint from the brand camel.
2) Yellow, orange red and green are chosen as theme colors.
3) The fist step towards the picture quilling is to take an impression on the card stock. As the background is very dark pencil tracing or impression will not work in this case. Another way to do this is to cut out the picture (printed on an A4 sized paper) finely with a long tipped scissors and paste it on the background within a defined area.

The picture is finely cut and pasted on the project background
4) The next set of steps includes working on the outline using white and light green text strips (from A1 Crafts) each of 3 mm width.
Completed outlining of the picture

5) Once the outline of the silhouette with text paper strips is completed, normal standard weight yellow and orange-red paper strips (from dimensions crafts) of 3 mm width again, are used to fill up the inner areas with the beehive pattern.
Beehive filling is going on
6) In parallel, set of Malysian flowers in yellow and orange color theme are created separately on silicone glue base and are kept for drying. Few light green leaves in marquise shape (with 4 inches, 3 mm wide paper strips) are also made and arranged below the picture as shown below.


Here comes the completed picture and one from the side view as well.


"If dreams of flying are the last hope of freedom, I will pray for wings with my last breath".. Steven Erikson.

Please visit my page "Lights and Papers" in Facebook for more pictures.

Wednesday 14 October 2015

The Pink Lady

It has been four months since I came to Orsay, France. When I came, I brought limited materials for my art and craft and had to sell most of the staffs. However, I feel even if materials were limited, because of my strong addition to quilling [now that I am 100% convinced about that !! ;)], I was in full swing all these months to create almost close to 20 projects. I would love to continue more and more and I wish and pray that this time I can seriously put my effort to do something in larger scale and in a more regulated and professional way.

With that small introduction, I am introducing my latest creation of the quilled picture series. Here comes the beautiful and sweet "PINK LADY", walking along the path of love and happiness.
The Pink Lady, as I named her, who is ready to walk the path of love and happiness
As with any quilled typography project, the steps are similar. The quilled picture and monogram series is wisely planned to be done on 6/8 inches card stocks, as I had limited materials. This one is also done on a white textured card stock paper, on which distressing effect is created with broken china ink from Tim Holtz and 3 coats of the ink in applied. The impression of the picture (hard copy print on any plain paper) is taken on the cardstock, which is very easy on these kinds of softly textured papers and you really do not have to press very hard to get a nice impression from the print (as shown below). Please use a pencil and just take an impression by keeping this printed paper on the cardstock (within the given area) and pressing a pencil over the outline with an optimum force.


The next steps are outlining, filling and decorations.

Zoomed view of the outlining

Crimson red, cream and black text strips (each 3 mm width, high gsm) from A1 craft supply is used to outline the gown, body and hair respectively. Thank you, Neha Gala, for providing the nice text strips to work with.

The Silhouette is Completed
Even if one wants to create a simple silhouette project, this can become the completed project by itself.

I was planning to work on it further. The composite flowers as shown at the left down corner on the gown are created with 3 mm wide papers. The length of 5.5 inches of dark and light pink paper strips and the length of 4 inches of light pink and orange color paper strips were used to create the larger and smaller composite flowers with marquise shape.

Series of beehives and spacious filling with loose coil or teardrop shapes in pink shades were followed to complete the work of the gown. Small Malaysian and tight coil flowers were made separately on a silicone glue base and were used for decorating the gown.


Once more the completed project with a side view. I really loved working on this and I hope you all will like her as well.

Thank you all for reading my post and please visit my page "Lights and Papers" in Facebook. Hope to present more such projects with time.

Customized nameplate for the family"Kushary"

My third quilled typography project got initiated with the request from my best friend (in USA now) Ranja. She was wishing to have a customized nameplate to decorate their newly bought home in New Jersey. After a real long discussion on the customizations, I went ahead with the following background created on an 8/12 inches photo paper (Fuji) with a crushed paper background in blue color, so that it goes with the theme of white door and light blue wall of her house. The writing font used for "KUSHARY" is Algerian and the design is created by me using windows powerpoint software.

Step 1: Design of project and the print
I had thought of a yellow and creme shaded beehive pattern to fill up the text and for that I have used paper strips of 3 mm width. Higher gsm text strips from A1 craft supply in blue color of width 3 mm is used for the outlines along with the light green text strips of same dimensions and weight to give some additional effect with the inner lines of this particular font.


The closed view of the outline with text strips
 Please note that the glue when dries up give a shining effect when light falls on it, because of the translucent nature of the glue. So use of glue has to be appropriate and to pour as much as close to the printed lines to achieve a neat finish, as much as possible within handmade precisions.


Now that the text outline is completed, the next step will be to fill up the inside region with tight beehive patterns so that the white area gets covered as much as possible. This is again to create a neat and clean finish. If you are planning to do the same project on a plain cardstock paper then taking an impression of the text will work, or if you working with canvas or wooden surface carbon tracing can be applied. Depending on which surface the project has to be created the initial step of background design and printing will differ accordingly.

As I mentioned before I have used shades of yellow and cream for the beehive mostly, with a trace of blue lines here and there to accentuate the overall effect.
Typography work is now completed
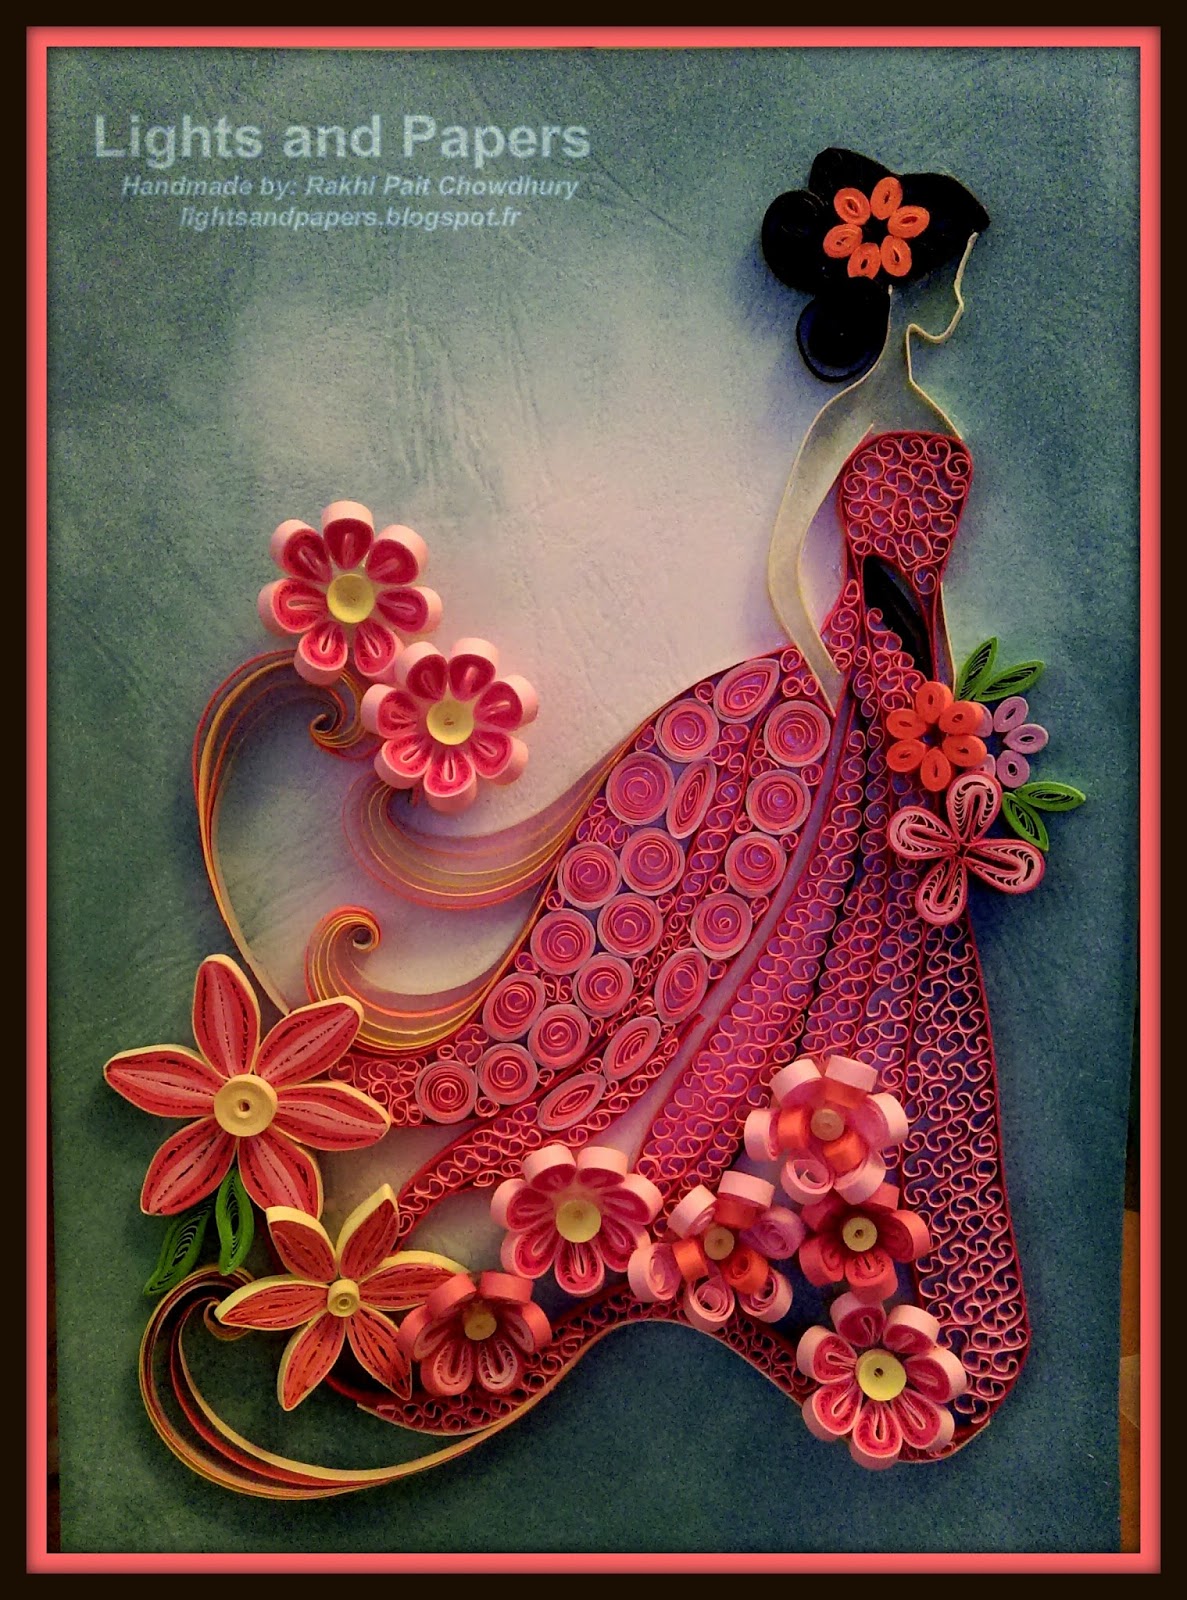
Typography work is now completed. The decoration of the nameplate can be done in ways as versatile as your imagination can go. As each project has an emphasis point, which, in this case, is definitely the family name types by quilling, I have planned a simple floral decoration.

Keeping the color contrast in mind a set of Malaysian flowers with a couple of composite flowers in yellow and cream are created, with a pink center, again accentuating the overall look and also breaking the monotony.

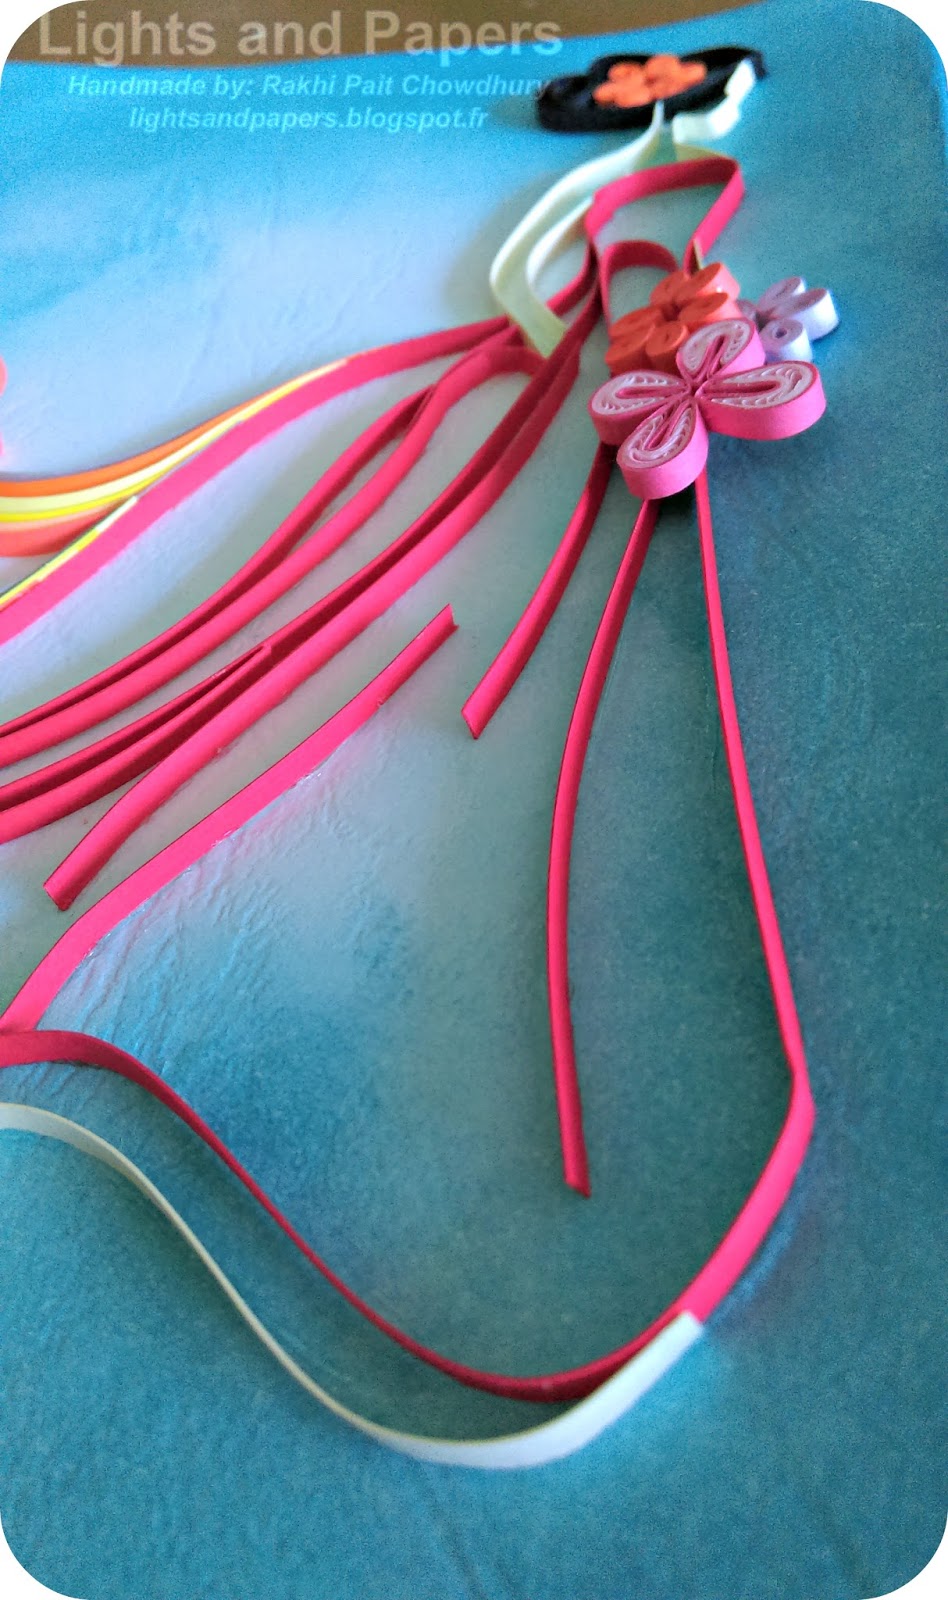
The final step is to assemble these flowers on the project. Adding a couple of white and pink swirls and lots of composite leaves in light green with a dark green border as base patterns definitely gives it a homely touch :) What you say??


If you like my work, please leave your comments and feedback. Also please visit my page "Lights and Papers" in Facebook to motivate me further.

Thank you!